The Right Order for Finish Carpentry Home Improvements: A Complete Guide
Want to refresh your trim and add character to your interior design, but don’t know where to start?
You’re not alone. One of the most common questions we hear from homeowners across Toronto and the GTA is: “I want to upgrade my trim and mouldings, but what should I do first?”
It’s a great question — and the answer matters more than you think. Tackling finish carpentry in the wrong order can mean ripping out brand-new work, wasting materials, and spending more money than necessary. The right sequence saves you time, money, and frustration, whether you’re doing everything at once or spreading projects over several years.
At Home Trim – Expert Finish Carpentry Toronto & GTA, we’ve completed hundreds of trim transformations, and we always guide our clients through the same proven order. Here it is.
Step 1: Door Replacement (Including Jambs, Stops, Hinges & Hardware)
Doors come first because every other trim element connects to them or runs alongside them. New casings wrap around door jambs. Baseboards butt up against door casings. If your doors aren’t set properly, nothing else will look right either.
Why You Should Replace the Jambs Too
We always recommend replacing the full door assembly — the door slab, jambs, door stop, hinges, and hardware — rather than just swapping the door itself.
Here’s why: if your existing jambs were installed poorly (and in many older Toronto homes, they were), a carpenter working with those old jambs has very limited options for adjustment. The jamb might be twisted, out of plumb, or shimmed incorrectly. No matter how skilled the installer, the quality of the finished product will be noticeably less compared to starting fresh with new everything.
When we install new jambs at Home Trim, we use solid wood jambs, screws, and shims — not nails, not pre-hung shortcuts. This method gives us full control over plumb, level, and reveal, which means your doors swing perfectly, close cleanly, and look sharp for decades.
Bottom line: Don’t invest in a beautiful new door only to hang it in a crooked old frame. Do it once, do it right.
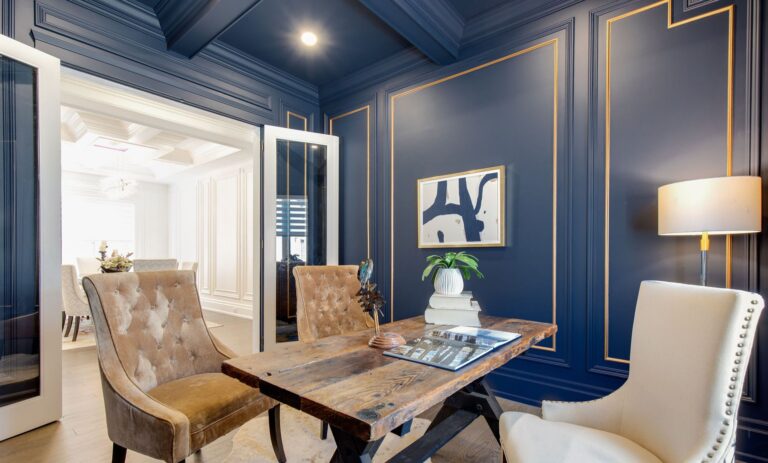
Step 2: Casing Replacement (Door Trim, Window Trim & Archway Trim)
Once your doors are set, casings are next. Casings are the trim pieces that frame your doors, windows, and archways — they’re one of the most visible design elements in any room.
Recommended Size: 3″ to 4″ Wide
We recommend casing profiles in the 3-inch to 4-inch range. This width provides a substantial, high-end look that frames openings beautifully without overwhelming the space. Thinner casings can look cheap, while anything wider than 4 inches starts to crowd smaller windows and standard doorways.
Casings go in after doors because they need to sit flush against the newly installed door jambs. If you install casings first and then replace doors later, you’ll likely need to redo the casings anyway — that’s wasted material and labour.
Pro tip: Matching your door casings, window casings, and archway trim in the same profile creates a cohesive, intentional look throughout your home. It’s a small detail that makes a big difference.
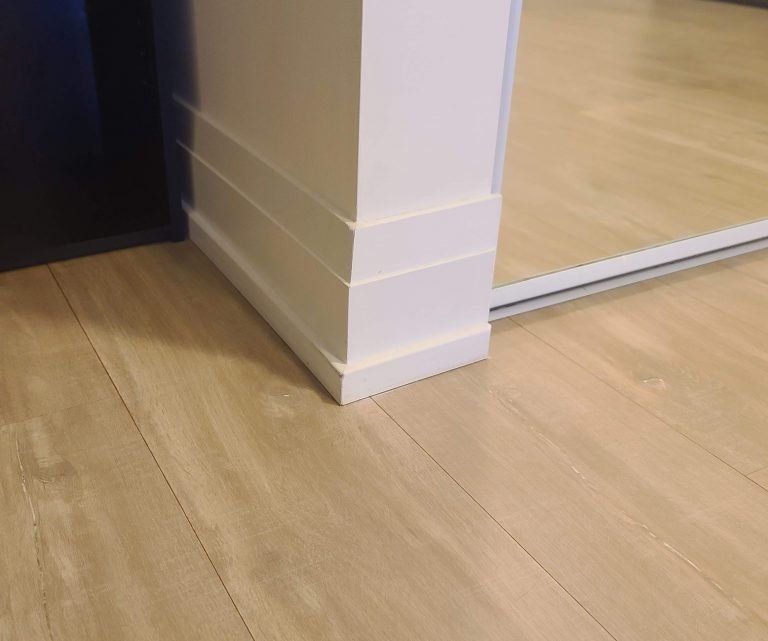
Step 3: Baseboard Replacement
With doors hung and casings installed, baseboards are the natural next step. Baseboards run along the bottom of your walls and terminate into door casings, so the casings need to be in place first to ensure clean, tight joints.
Recommended Size: 7¼” Tall
We recommend 7¼-inch baseboards for most homes. This height adds serious visual presence to a room and is one of the fastest ways to make a space feel more finished and upscale. Paired with 3–4 inch casings, this proportion looks balanced and intentional.
Baseboards are also one of the most cost-effective trim upgrades you can make. They cover the gap between your flooring and walls, hide imperfections, and instantly elevate the feel of any room.
Step 4: Crown Moulding
Crown moulding is where things get a little more nuanced. It can technically be installed at any point after your baseboards are done, but the type of wainscoting you’re planning (if any) changes the timing significantly.
Recommended Size: 7″ Crown Moulding
A 7-inch crown moulding profile strikes the ideal balance — bold enough to make a statement, proportional enough to complement standard 8- to 9-foot ceiling heights common in Toronto homes.
Crown Moulding and Wainscoting: Timing Matters
Here’s where the order gets important, and it depends on which type of wainscoting you’re considering:
If you’re planning picture frame wainscoting (applied moulding on the wall): Install crown moulding before the wainscoting. Getting the crown up first means your wainscoting installer (or you, if it’s a future project) simply works below it.
If you’re planning full wall wainscoting with recessed panels: This is a different story entirely. Full wall recessed panel wainscoting runs from floor to ceiling, and the crown moulding should be installed on top of the panels — meaning the panels go up first, and the crown sits on top as the finishing piece. Installing crown moulding before full wall panels would mean tearing it down and reinstalling it, which wastes both material and money.
Quick reference:
- Picture frame wainscoting → Crown moulding goes up first
- Full wall recessed panel wainscoting → Panels go up first, crown moulding goes on last, on top of panels
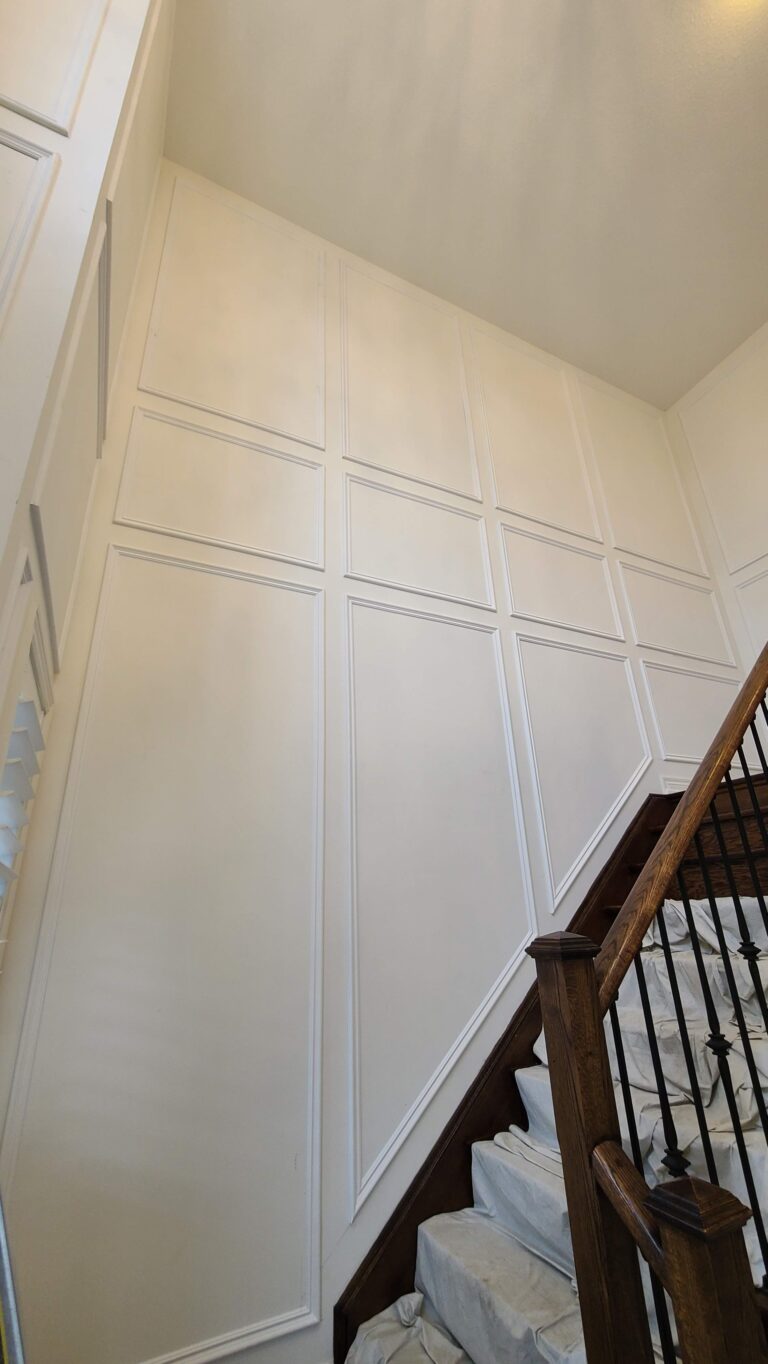
Step 5: Wainscoting
Wainscoting is the crown jewel of finish carpentry — it’s the upgrade that truly transforms a room from ordinary to extraordinary. Whether you choose classic picture frame style, beadboard, shaker panels, or full wall recessed panels, wainscoting adds depth, texture, and architectural character that no paint colour or wallpaper can replicate.
Wainscoting comes last in the sequence because it references everything else: it meets baseboards at the bottom, works around casings, and (in the case of full wall panels) supports crown moulding at the top. Every preceding element needs to be locked in before wainscoting goes on.
What About Accent Features and Waffle Ceilings?
Accent elements — such as feature walls, accent mouldings, or decorative panels in specific areas — are more flexible in terms of timing. They’re typically standalone features that don’t interfere with the sequential logic above, so they can be added at almost any stage of your renovation.
Waffle ceilings, however, have a specific place in the order:
- Install waffle ceilings before crown moulding. Crown moulding runs along the perimeter where the wall meets the ceiling, and if waffle ceiling panels are added afterward, you’d need to remove and reinstall the crown to accommodate them — wasting material and labour.
- Install waffle ceilings before full wall wainscoting for the same reason: the ceiling treatment should be in place before wall panels that run floor to ceiling.
The priority sequence for ceiling and wall treatments: Waffle Ceiling → Crown Moulding → Wainscoting
The Golden Rule: Commit Before You Move On
Here’s the most important piece of advice we give every client: make sure you’re completely satisfied with each step — and won’t want to change it for at least five years — before moving on to the next one.
Why? Because each subsequent project builds on top of the previous one. If you install beautiful new baseboards and then decide six months later to replace your door casings, the baseboards that terminate into those casings may need to be adjusted, patched, or replaced too. The same goes for every step up the chain.
Finish carpentry is sequential by nature. Each element connects to the next. Changing something early in the sequence can create a domino effect that costs you time and money down the line.
Take your time. Live with each upgrade. Love it. Then move forward.
Why Choose Home Trim for Your Finish Carpentry Project?
At Home Trim – Expert Finish Carpentry Toronto & GTA, trim and moulding is all we do — and we do it exceptionally well. From crown moulding and wainscoting to baseboards, casings, and waffle ceilings, we bring precision craftsmanship and years of experience to every project across 14 cities in the GTA.
Whether you’re upgrading one room or transforming your entire home, we’ll help you plan the right sequence, choose the right profiles, and execute every detail to perfection.
Ready to start your finish carpentry transformation?
Visit us at hometrim.ca or call (647) 302-1020 to book your free consultation today.
Home Trim – Expert Finish Carpentry Toronto & GTA specializes in crown moulding, wainscoting, baseboards, casings, waffle ceilings, and complete trim packages for homeowners across Toronto, Mississauga, Brampton, Oakville, Burlington, Hamilton, Vaughan, Richmond Hill, Markham, Pickering, Ajax, Whitby, Oshawa, and surrounding areas.